Verify AscendEX
How to Complete your Account Verification【PC】
In order to be eligible for exclusive benefits and higher withdrawal limits, please ensure your identity verification is complete. Here’s how to verify your account!1.Visit ascendex.com and click on the [My Account] icon. Then click on [Account Verification].

2.Click on [Verify Now] to begin the verification process. This will take you to your Personal Information page.

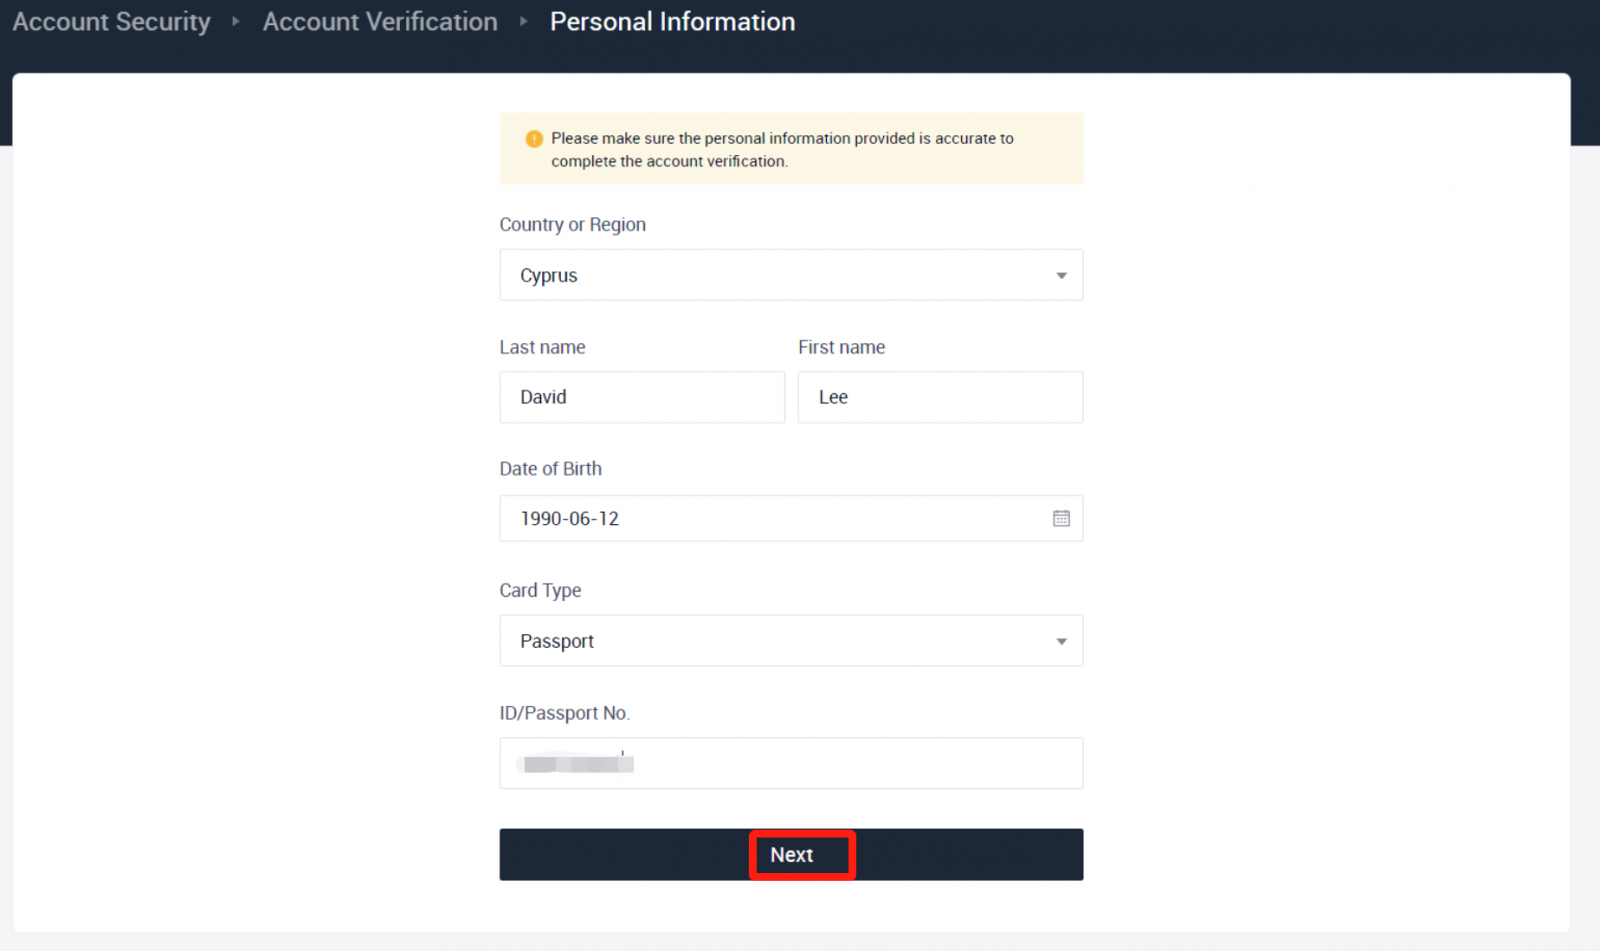
3. Once you are on the Personal Information page, select your country/region, enter your first name and last name; select ID Type, enter your ID number, and click on [Next].
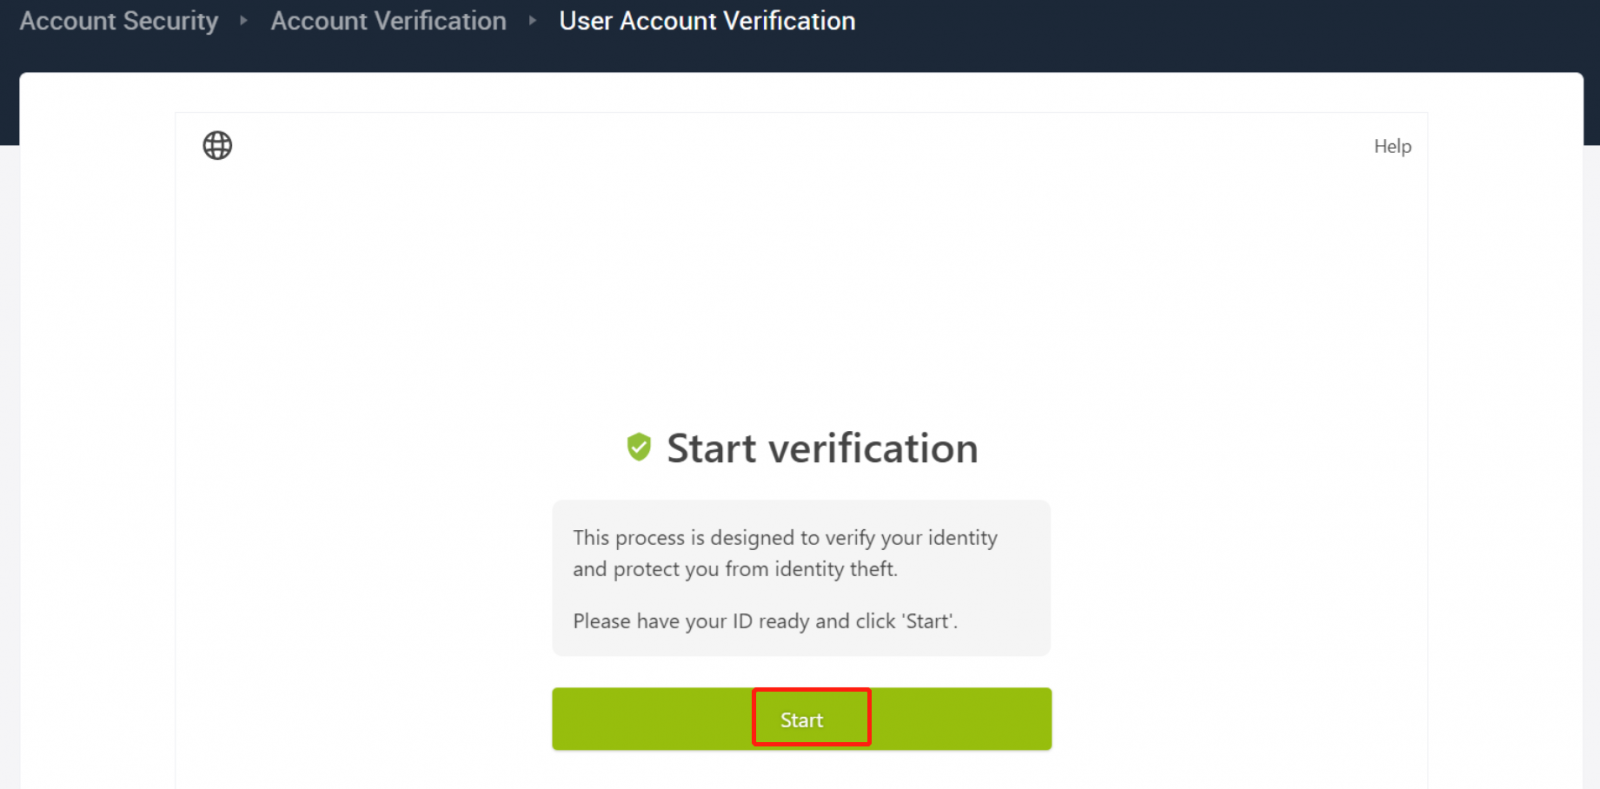
4. Please make sure you have your ID ready and then click on [Start].
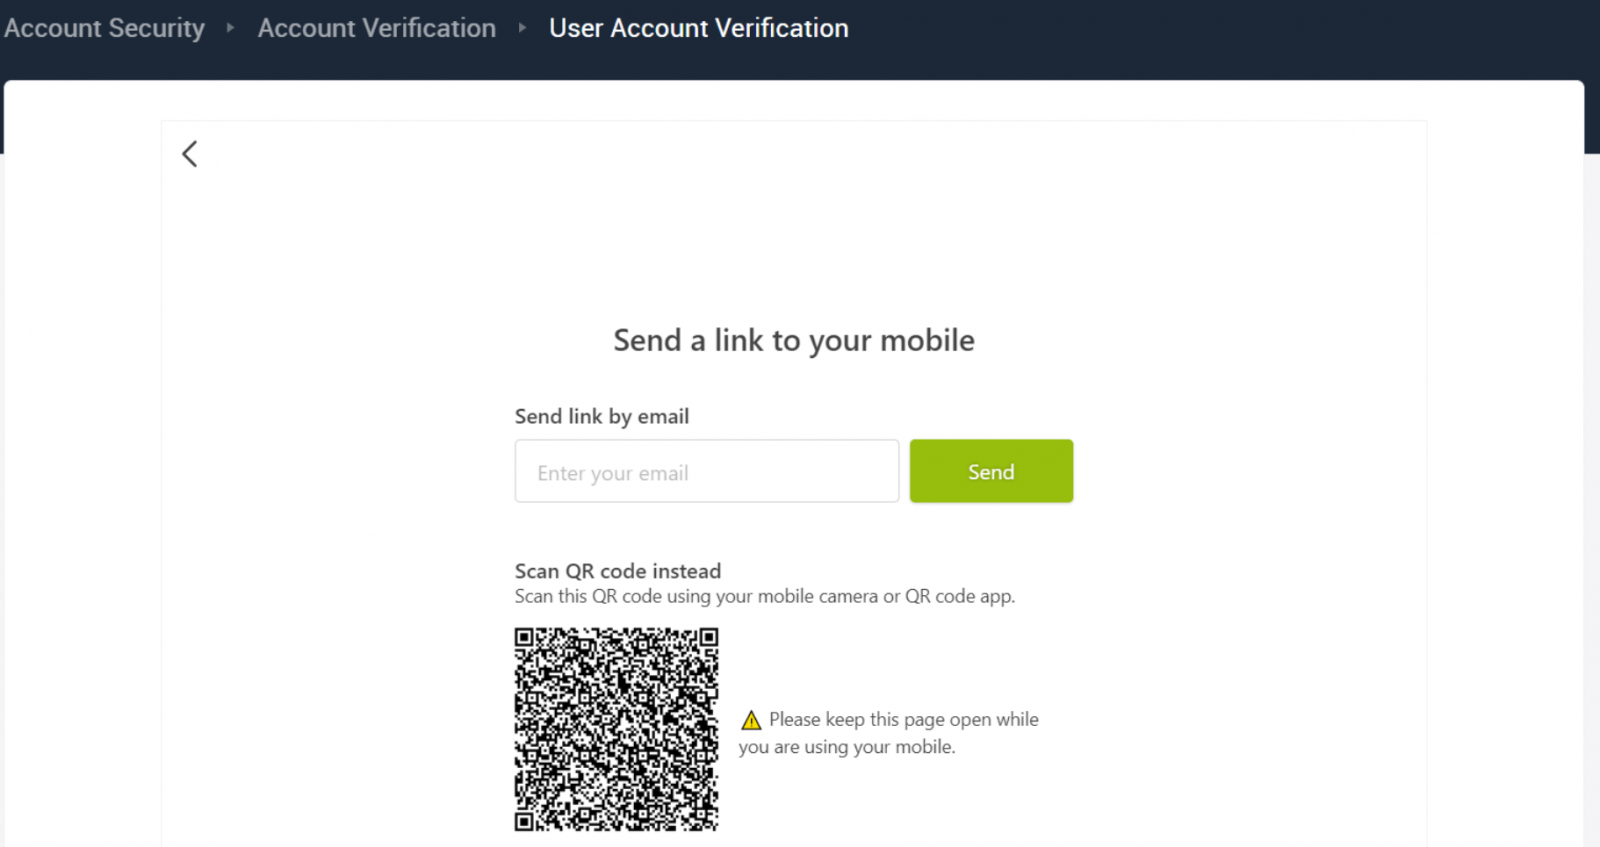
5. Click on [Take Photo] to start the verification process. If you prefer to use your mobile device, click the second button to continue on the AscendEX mobile app.

If you choose to finish your verification on a PC, click on [Take photo] and complete the following steps:
1. Take a photo of your ID and make sure it is centered within the frame. Then, click on [Start].
2. If there is the popup reminder requesting access to your camera, please allow access.
3. Center the front of your ID within the frame and take a photo. Please make sure the image is clear and readable. Then click [Confirm].
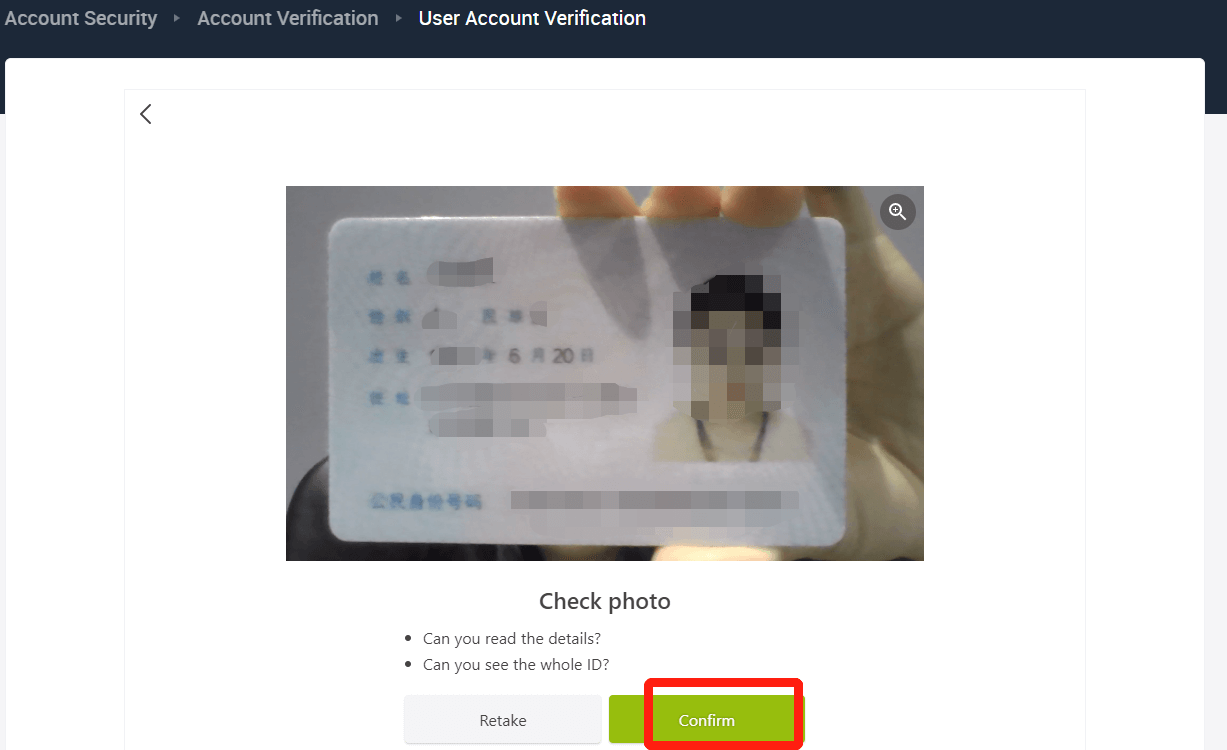
4. Center the back of your ID within the frame and take a photo. Please make sure the image is clear and readable. Then click [Confirm].
5. Click [Start] to begin the facial recognition process.
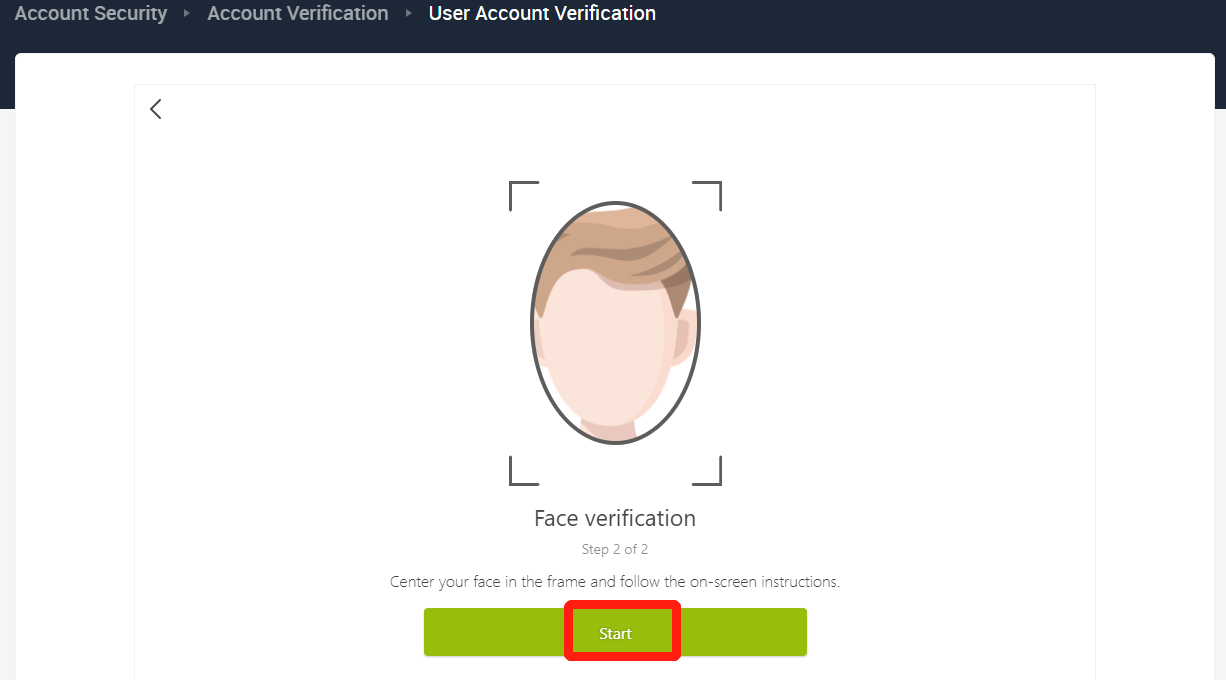
6. Please make sure to center your face within the frame and follow the on-screen instructions to complete the facial recognition scan. Please wait while the system processes your facial recognition. Once it is completed, you will have a verified account.
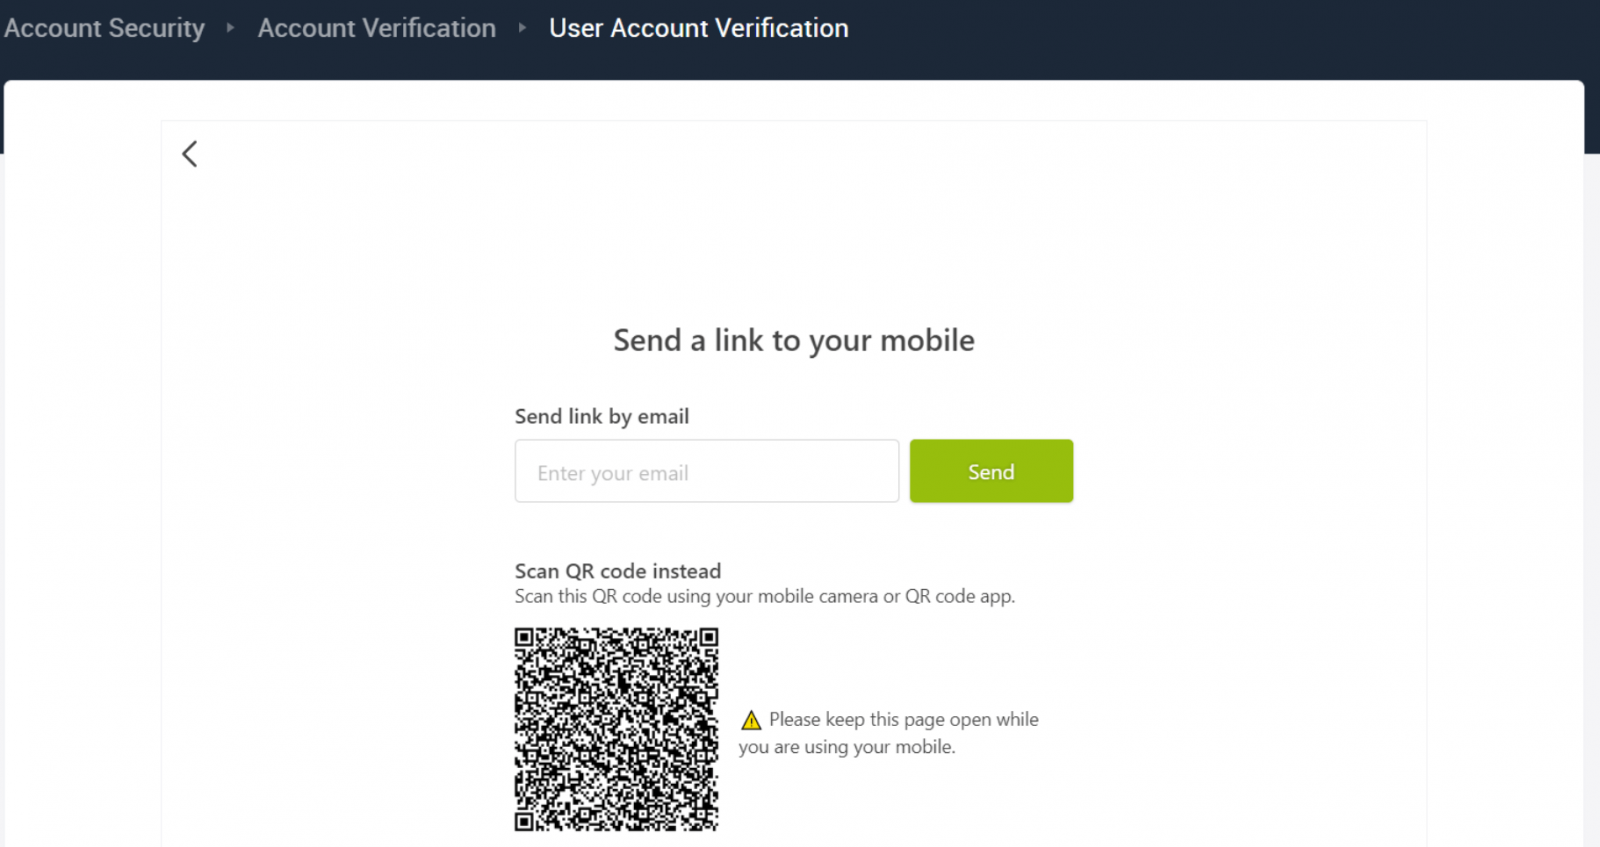
If you prefer to finish your verification on app, click on [Prefer to use your mobile?] and take the following steps:
1. Send a link to your mobile by entering an email or scanning the QR code.
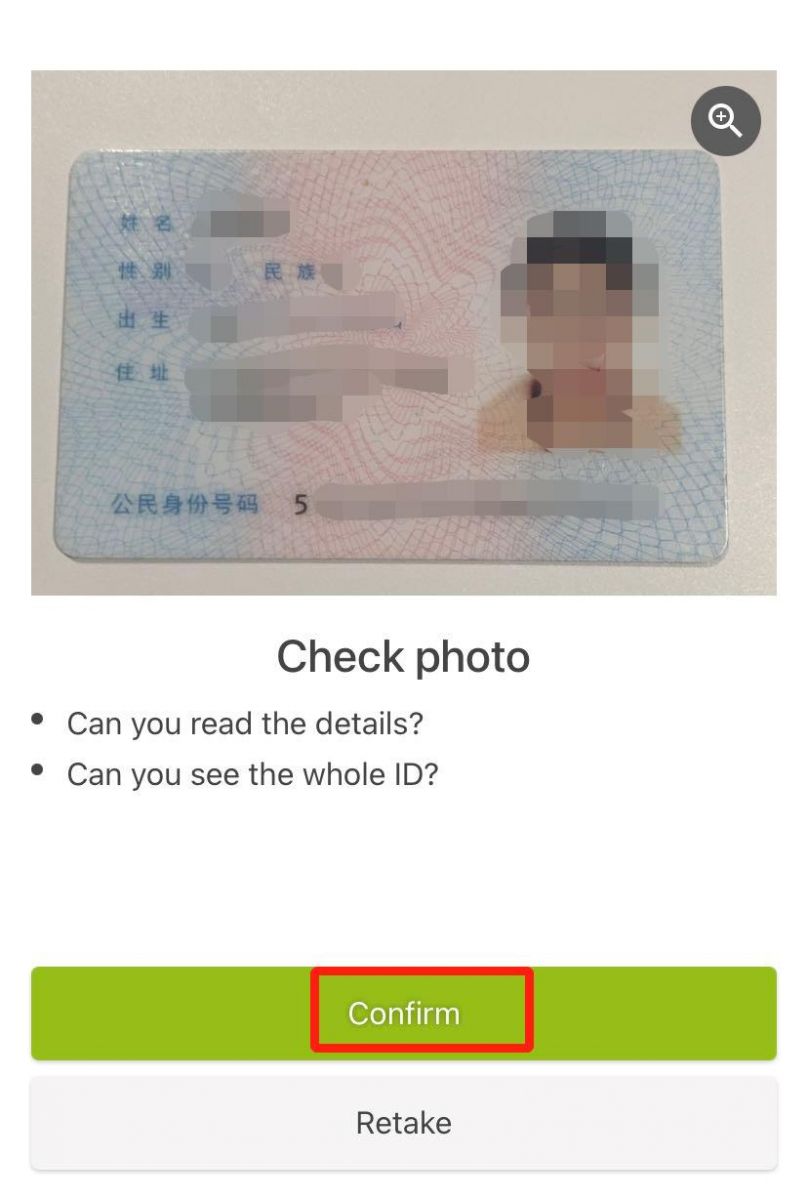
2. Take photos of both sides of your ID and make sure the photos are clear and readable. Then, click on [Confirm]. If the photos are not clear, please click on [Retake].
3. Click [Start] to begin the facial recognition process. Please make sure to center your face within the frame and follow the on-screen instructions to complete the facial recognition process.
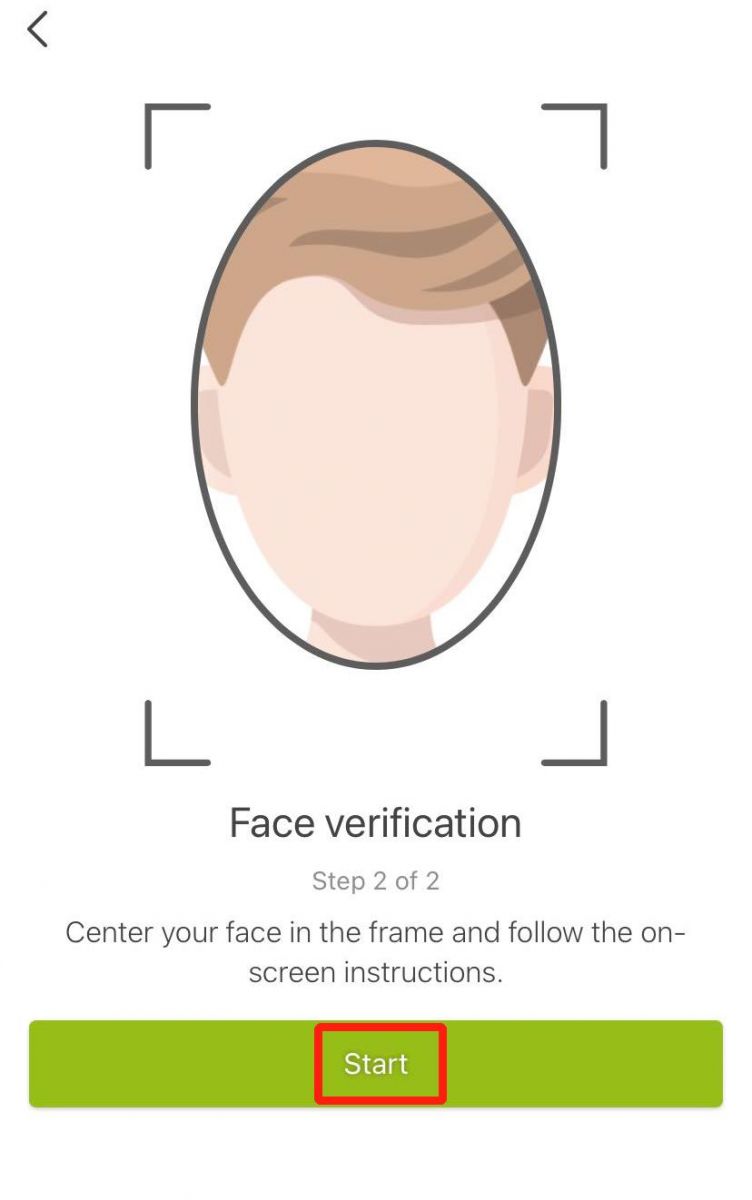
4. Please wait while the system processes your facial recognition. Once it is completed, you will have a verified account.
How to Complete Your Account Verification【APP】
In order to be eligible for exclusive benefits and higher withdrawal limits, please ensure your identity verification is complete. Here’s how to verify your account!1. First, open the AscendEX app and click on your profile icon to enter your personal account page. Click on the Identity Verification button to enter the Verification page.
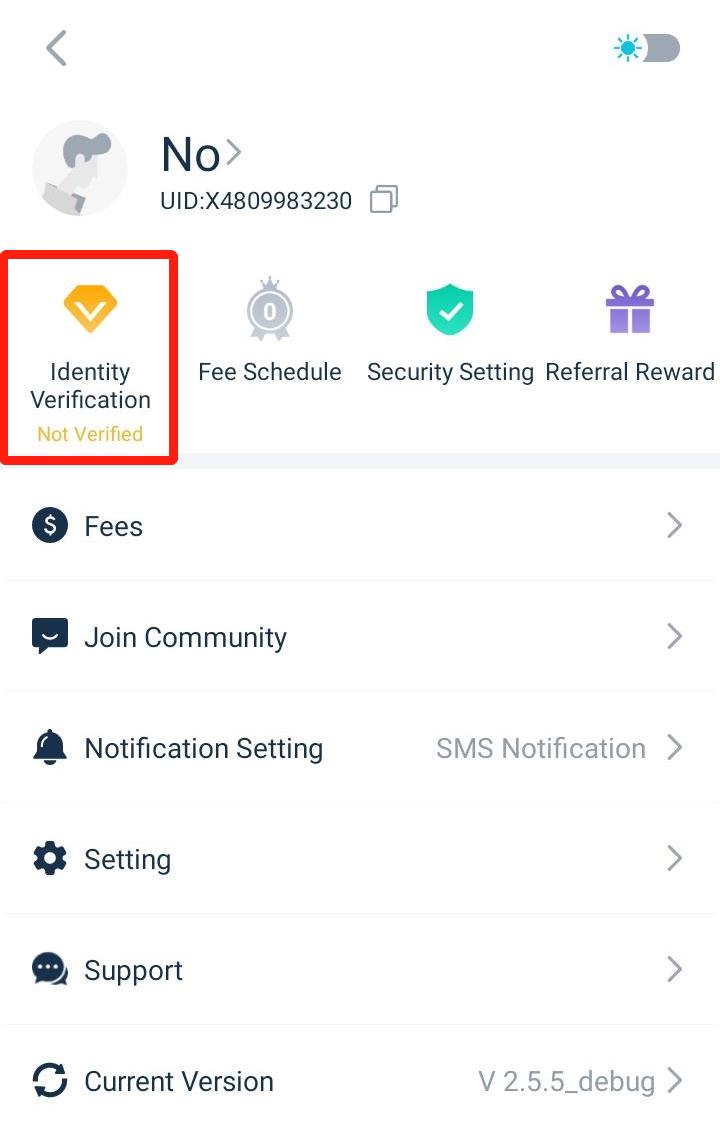
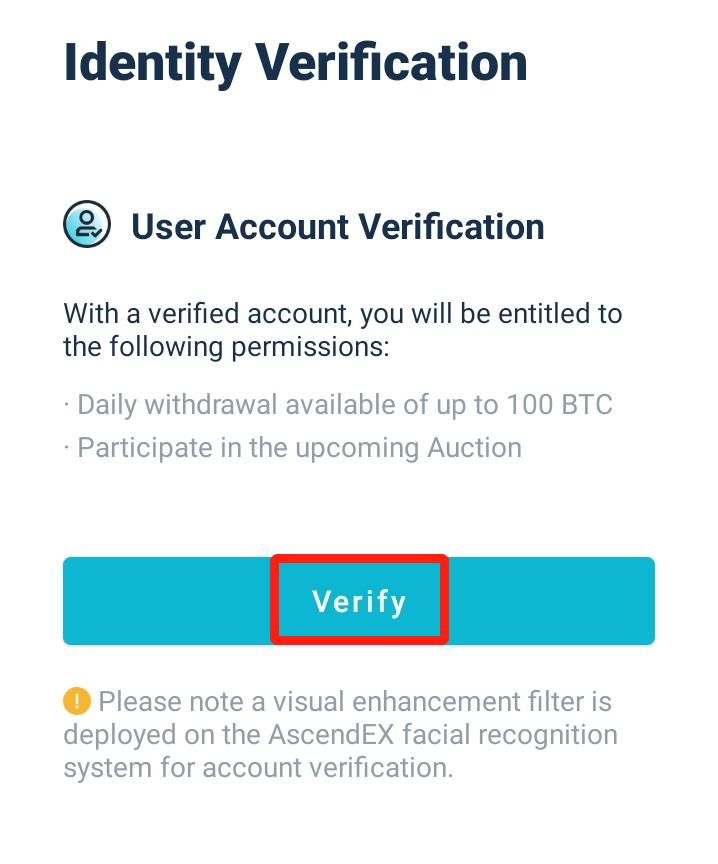
2. Click on [Verify] to begin the verification process. This will take you to your Personal Information page.
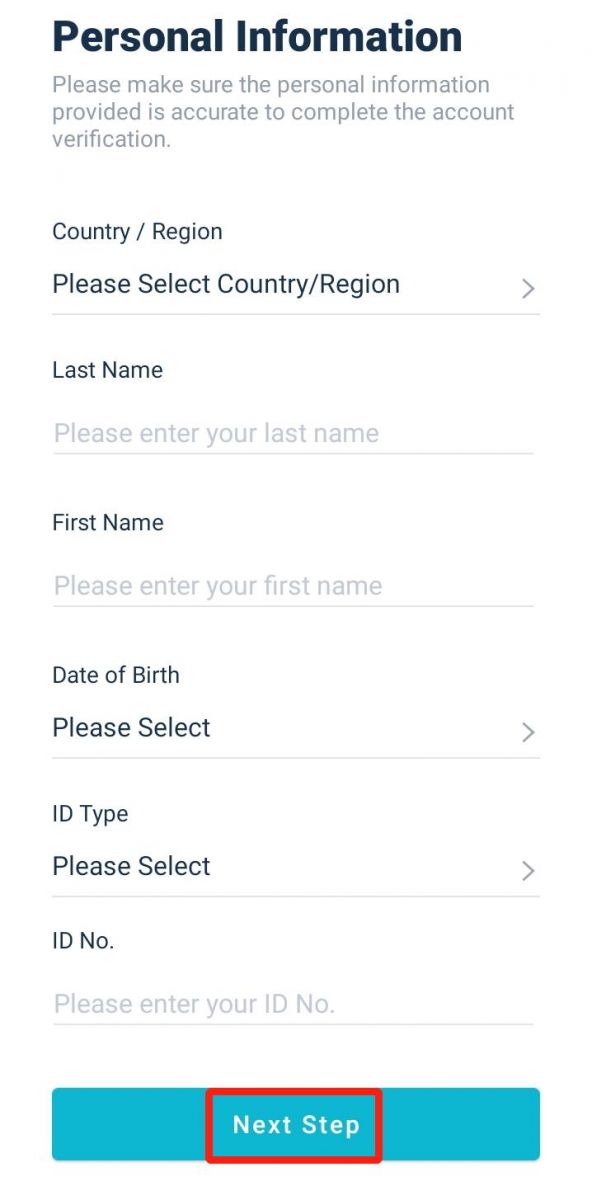
3. Once you are on the Personal Information page, select your country/region, enter your first name and last name; select ID Type, enter your ID number, and click on [Next Step].
4. Select the type of document you wish to scan.
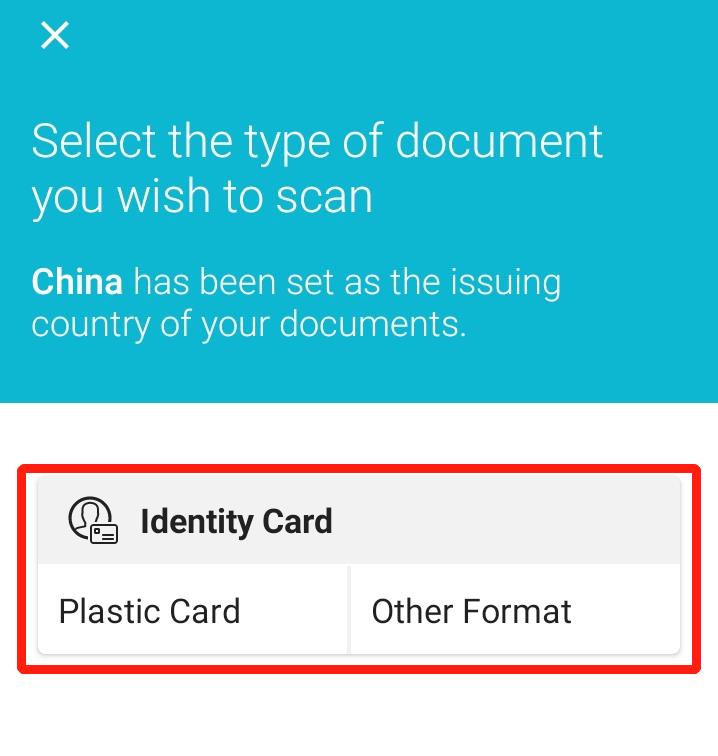
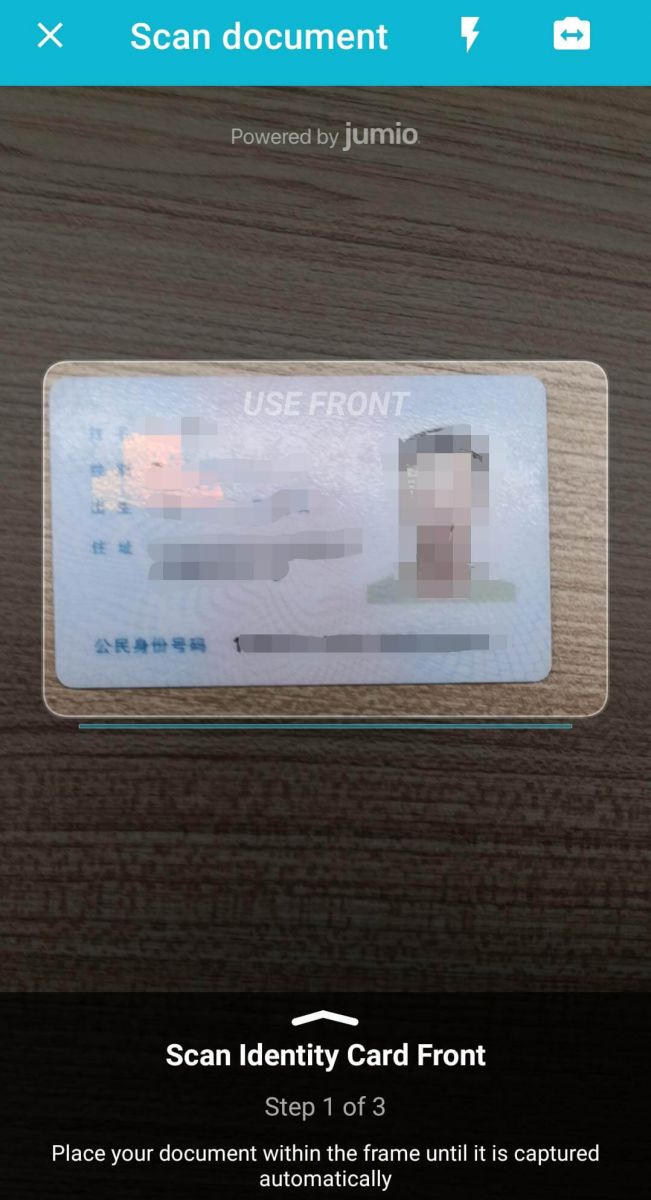
5. Place your document within the frame until it is automatically captured. Please scan both sides of the document.
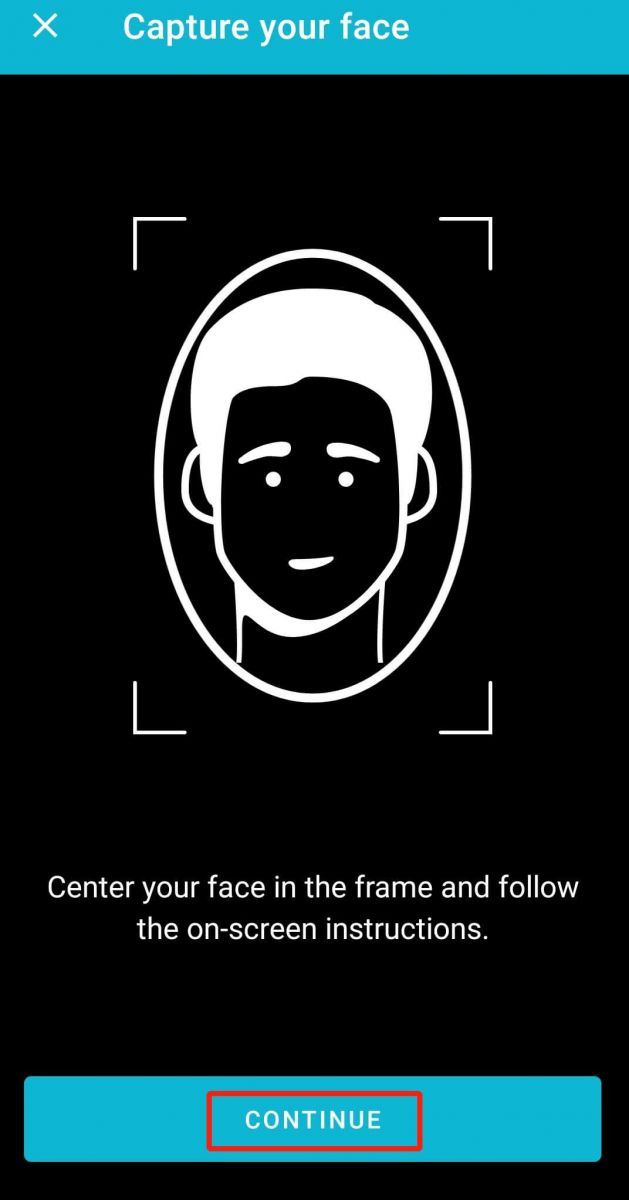
6. Please make sure to center your face within the frame and follow the on-screen instructions to complete the facial recognition scan. Once it is completed, click on [Continue].
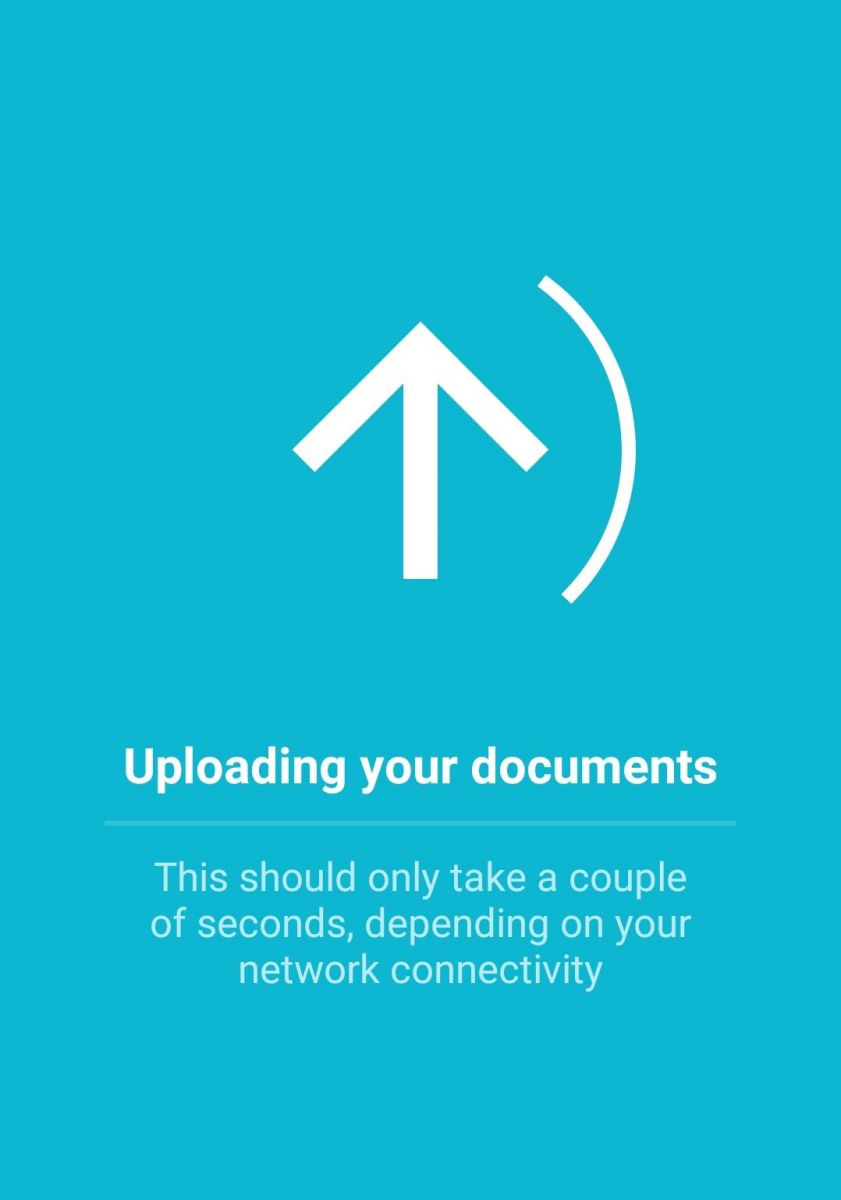
7. Please wait while the system processes your facial recognition. Once it is completed, you will have a verified account.
How to Set Google (2FA) Verification【PC】
Google 2-Step Verification (2FA) is required on AscendEX for user account security. Please follow the following steps to set Google 2FA:1. Visit AscendEX official website, click on [My Account] - [Account Security].

2. On Account Security page, click on [Enable] next to [Google 2FA] to enter the verification page.
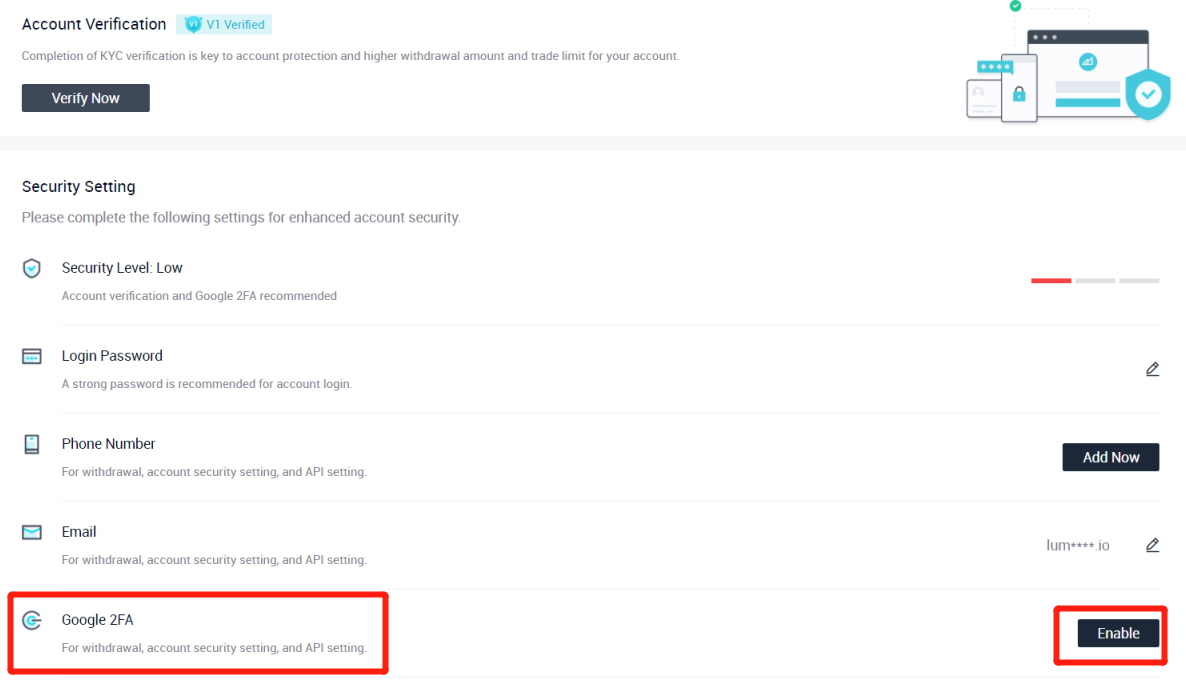
3. Click [Send], enter the email/SMS verification code that you received and click on [Generate 2FA Secret Key].
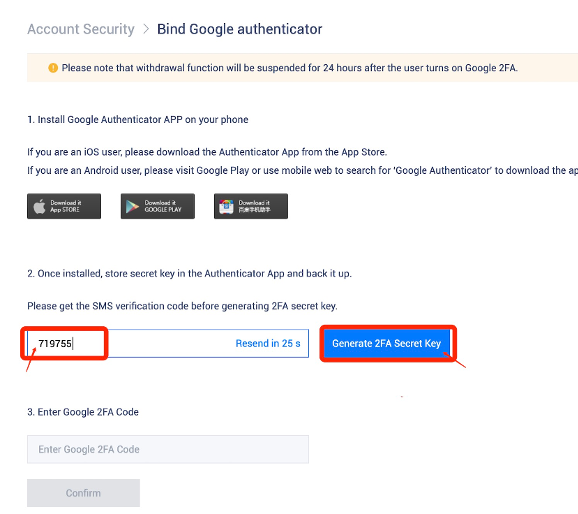
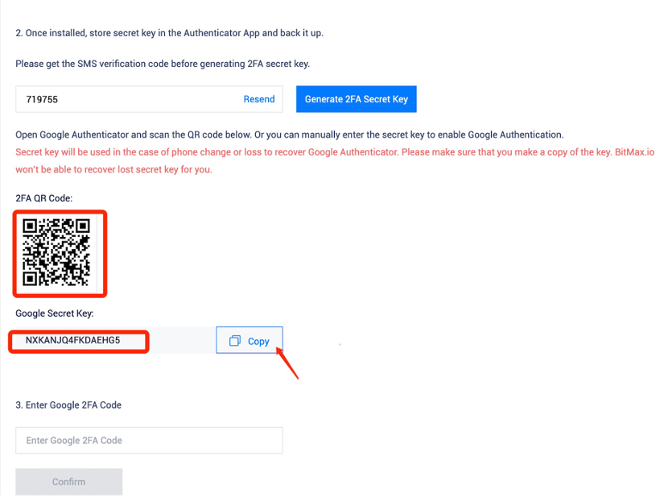
4. Save the 2FA QR Code to your phone, or copy and save the Google Secret Key.
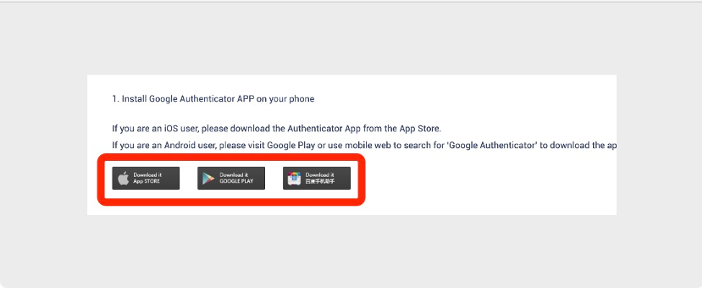
5. Download Google Authenticator App to your phone. Read instructions on the page if you dont know how to download the App.
6. Open Google Authenticator, follow instructions to add your account by scanning the QR Code that you just saved, or by entering the secret key that you copied.
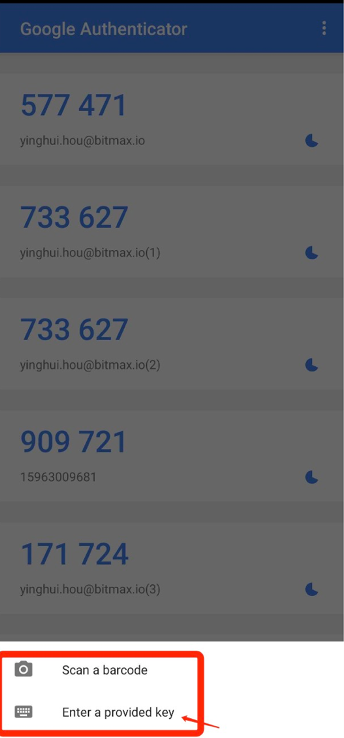
7. For example, if you choose to bind via the secret key, click on [Enter a provided key] to provide account details.
Enter account name and your key, click on [ADD] to complete.
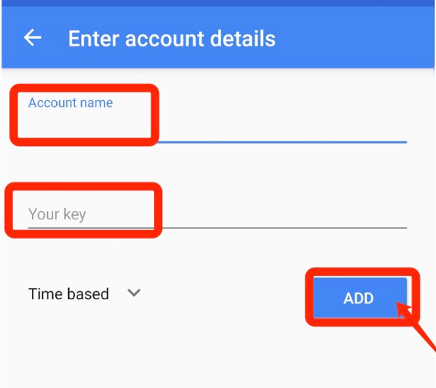
The Google Authenticator will generate a unique 6-digit verification code every 30 seconds.
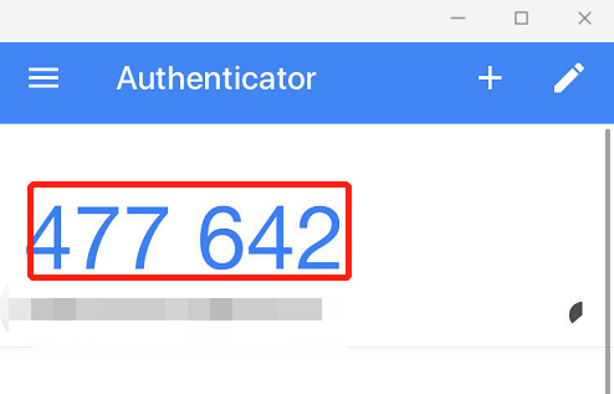
(It is highly recommended that you save the key or QR code as backup. In case the phone is lost, you can re-bind it on your new phone.)
8. Return to the Google Authenticator page, enter the latest 6-digital code that your Authenticator generates, click on [Confirm].
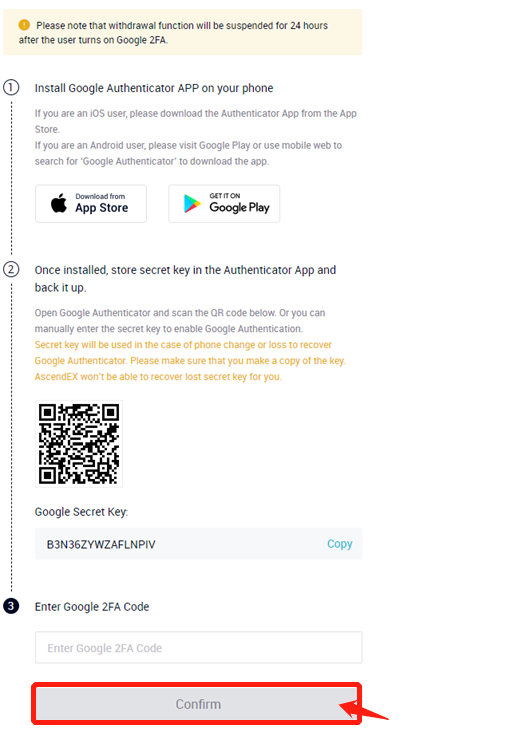
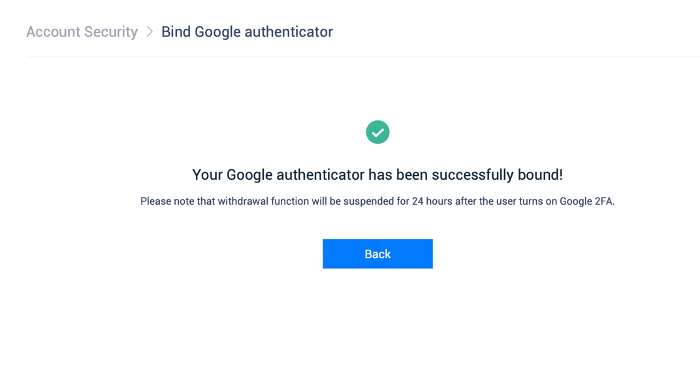
9. A pop-up message will appear when the binding is successful. Please note that withdrawal function will only be available at 24 hours after that for security reason.
Notes:
The 6-digit 2FA verification code is required for login and other security-required operations on AscendEX. It changes once every 30 seconds. Please make sure the code your enter is the latest one.
If you have forgotten your backup key or QR code, please send a video request from your registered email to [email protected] per the following requirements:
- In the video you should hold your government issued ID and a signature page.
- The signature page must include: AscendEX account, date and “Please disable my Google 2FA”.
- In the video, you should clearly state your AscendEX account and the reason for disabling Google 2FA.
How to Set Google (2FA) Verification【APP】
1. Open AscendEX App, click on [Me] -[Security Setting].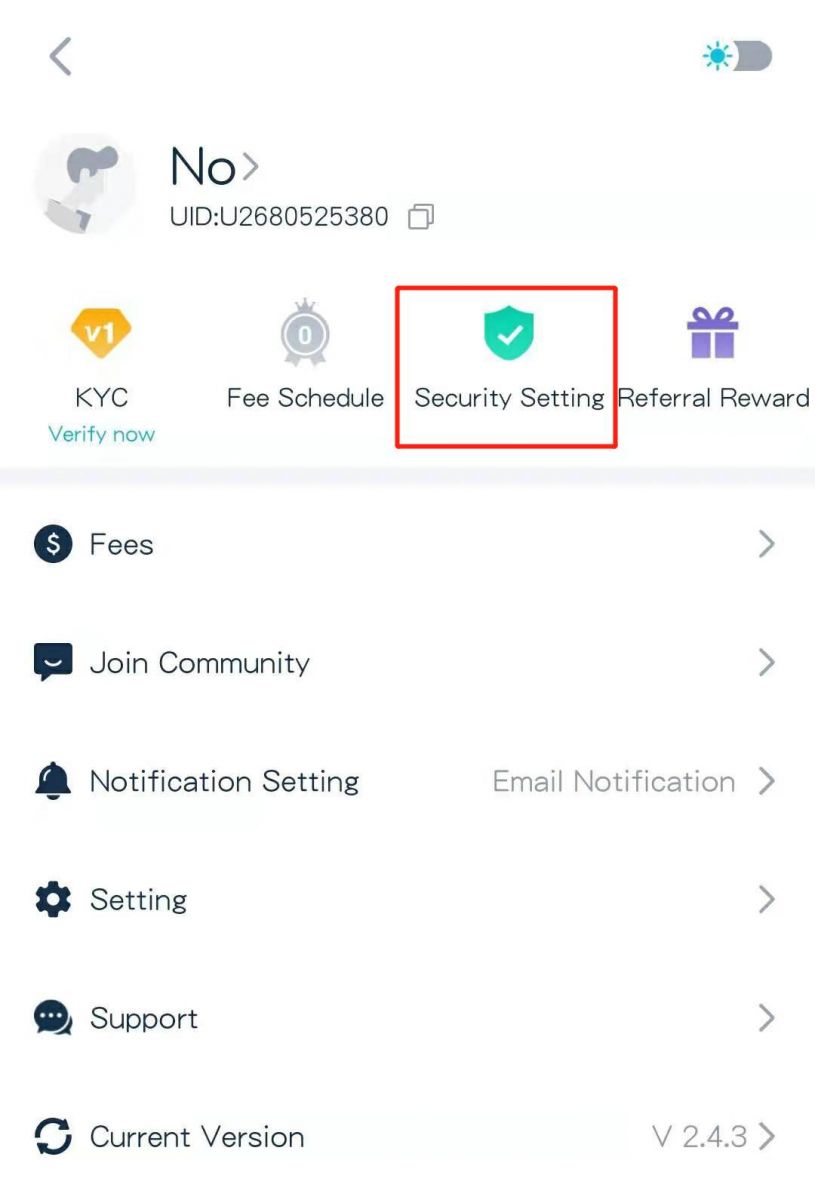
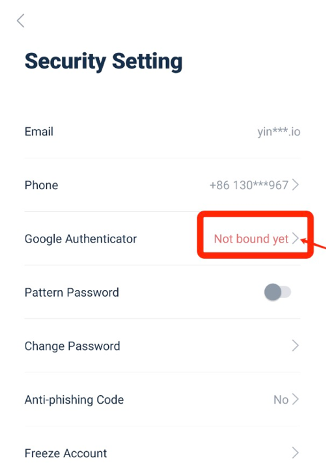
2. Click on [Not bound yet] next to [Google Authenticator].
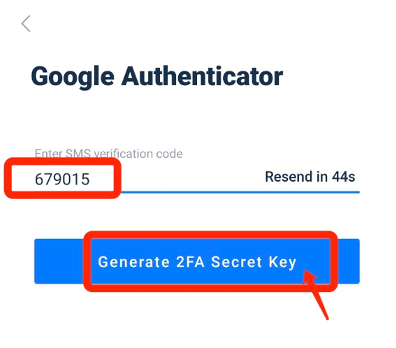
3. Click on [Send] to get email/SMS verification code. Enter the code that you receive and click on [Generate Google Secret Key].
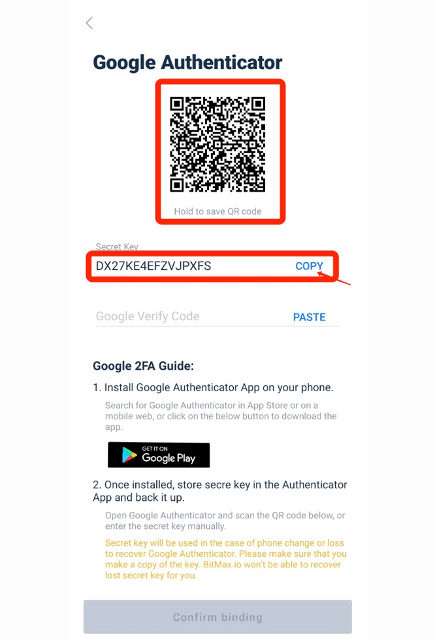
4. Save the 2FA QR Code to your phone, or copy and save the Google Secret Key.
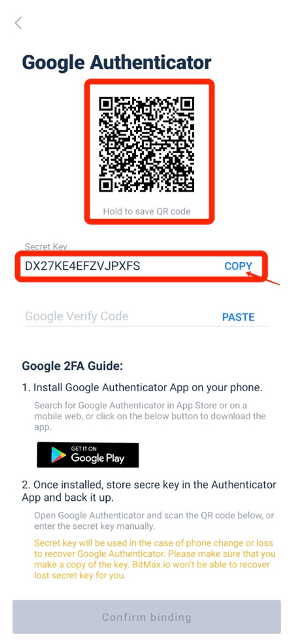
5. Download Google Authenticator App to your phone. Read instructions on the page if you dont know how to download the App.
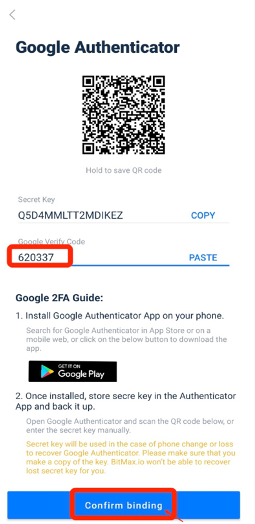
6. Open Google Authenticator, follow instructions to add your account by scanning the QR Code that you just saved, or by entering the secret key that you copied.
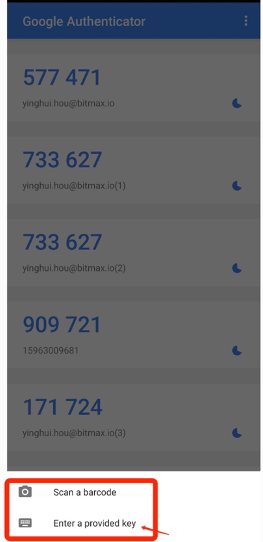
7. For example, if you choose to bind via the secret key, click on [Enter a provided key] to provide account details.
Enter account name and your key, click on [ADD] to complete.
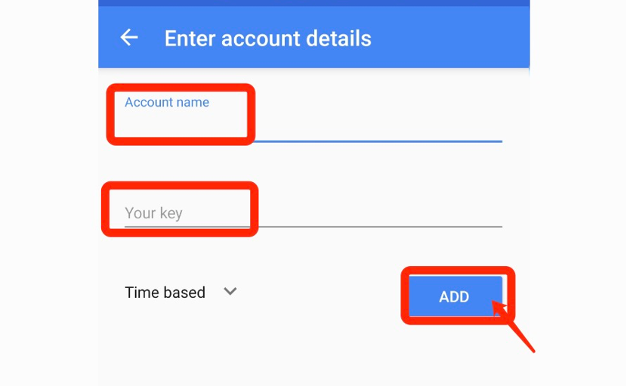
The Google Authenticator will generate a unique 6-digit verification code every 30 seconds.
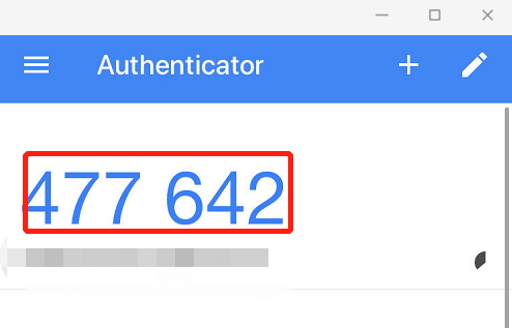
(It is highly recommended that you save the key or QR code as backup. In case that the phone is lost, you can re-bind it on your new phone.)
8. Return to the Google Authenticator page on AscendEX App, enter the latest 6-digital code your Authenticator generates, click on [Confirm].
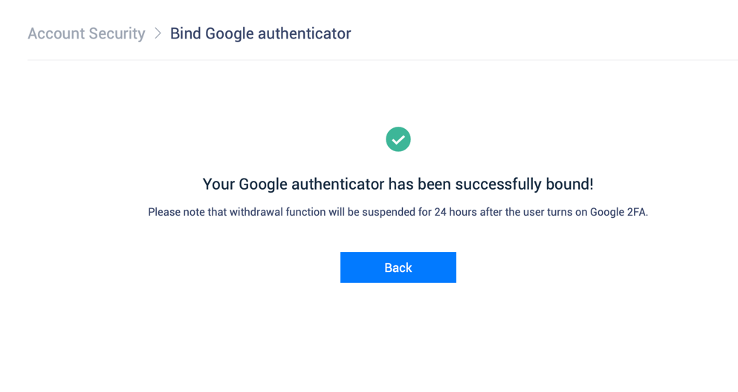
9. A pop-up message will appear when the binding is successful. Please note that withdrawal function will only be available at 24 hours after that for security reason.
Notes:
The 6-digit 2FA verification code is required for login and other security-required operations on AscendEX. It changes once every 30 seconds. Please make sure the code your enter is the latest one.
If you have forgotten your backup key or QR code, please send a video request from your registered email to [email protected] per the following requirements:
- In the video you should hold your government issued ID and a signature page.
- The signature page must include: AscendEX account, date and “Please disable my Google 2FA”.
- In the video, you should clearly state your AscendEX account and the reason for disabling Google 2FA.
FAQ
Two factor authentication failed
If you receive a "Two factor authentication failed" after you input your Google Authentication code, please follow the instructions below to solve the problem:
- Synchronize the time on your mobile phone (Go to the main menu on the Google Authenticator app select Settings - Select Time correction for codes - Sync now. If you use iOS please set Settings - General - Date Time - Set Automatically - to On, then make sure your mobile device displays the correct time and try again.) and your computer (from which you attempt to login).
- You can download authenticator extension of chrome (https://chrome.google.com/webstore/detail/authenticator/bhghoamapcdpbohphigoooaddinpkbai?hl=en) on computer, then use the same private key to check if the 2FA code is the same with the code on your phone.
- Browse the Login page using incognito mode on the Google Chrome web browser.
- Clear your browser cache and cookies.
- Try to login from our dedicated mobile app.
How to Reset Security Verification
If you have lost access to your Google Authenticator app, phone number or registered email address, you can reset it per the following steps:1. How to reset Google Verification
Please send a video application (≤ 27mb) from your registered email to [email protected].
- In the video you should hold the passport (or ID card) and a signature page.
- The signature page must include: account email address, date and "apply for unbinding the Google verification."
- In the video you should state the reason for unbinding the Google verification.
2. How to change phone number
Please send an email to [email protected].
The email must include:
- Your previous phone number
- Country Code
- Last four digits of your ID/Passport No.
3. How to change registered email address
Please send an email to [email protected].
The email must include:
- Photos of the front and back of your ID/Passport
- A selfie of yourself holding your ID/Passport and Signature
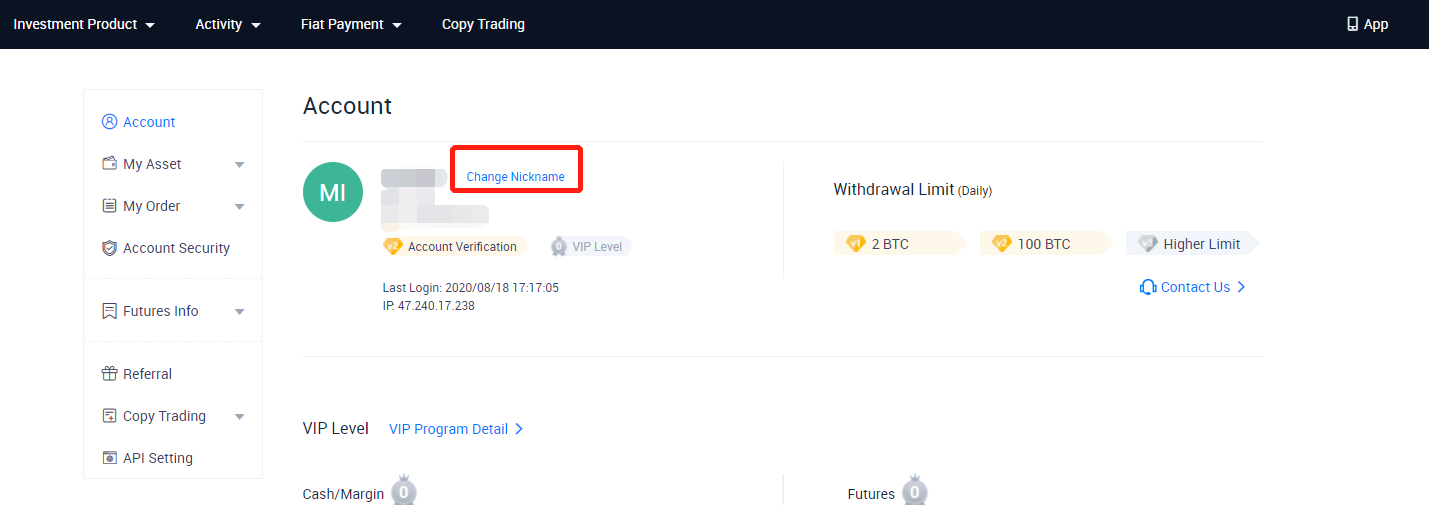
- Full screenshot of the [Account] page. On the page, please change the nickname to the new email address you want to use
The Signature must include:
- Previous registered email address
- Date
- AscendEX
- "Change the registered email address" and the reason
- "Any potential asset losses caused by my change of registered email address have nothing to do with AscendEX"
*Note: The new email address you provide must have NEVER been used for registration on the platform.


